WELP, to the enormous surprise of absolutely no-one we’re back in lockdown here in Melbourne. It’s going to be a long six weeks, but I’m very conscious of how lucky we are that we have a state Premier who cares enough about us that he’ll do the unpopular thing and lock us down (since it’s obvious we can’t be trusted to do the right thing by ourselves). Massive Dad vibes there.
They’ve also finally changed their tune about masks, and are recommending that people wear them when they’re in situations where it’s difficult to socially distance (supermarkets, testing queues, etc).
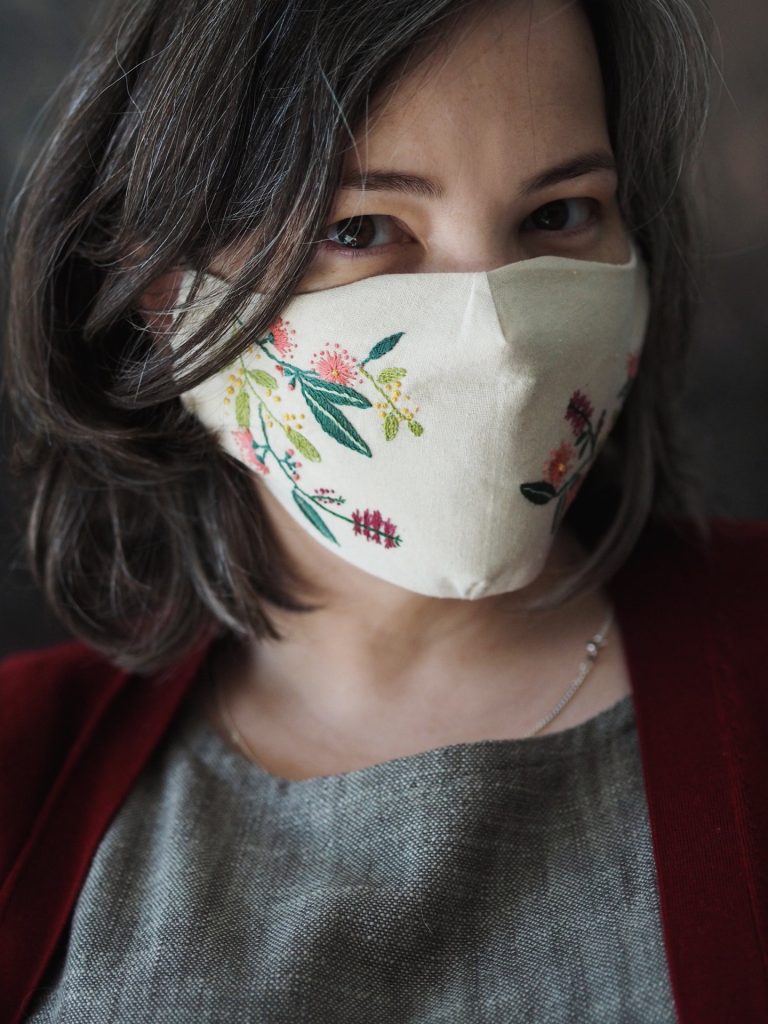
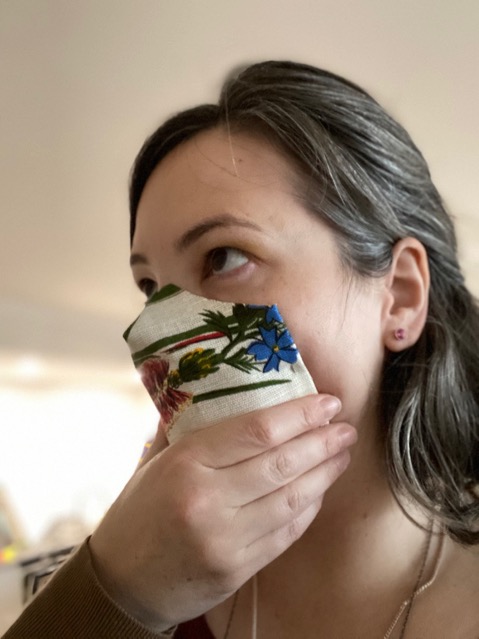
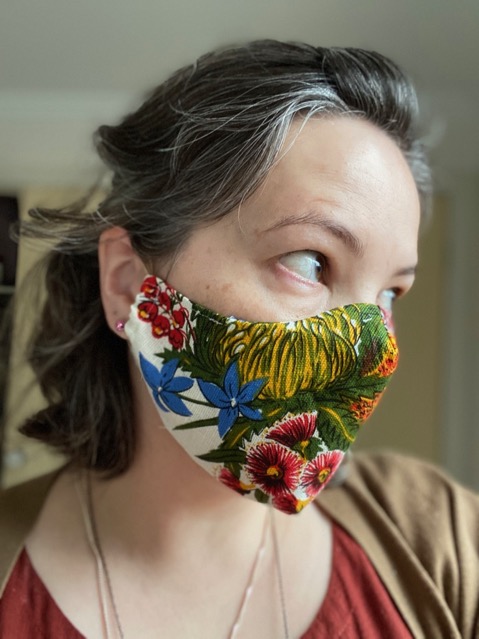
I’ve made a number of cloth masks since March – including this slightly OTT embroidered version – and I’ve had quite a few people asking for the pattern/tutorial, so here we go!
I tweaked a couple of different mask patterns that I found on the internet, and the very wonderful Ginevra Martin turned my dodgy drawing into a beautiful PDF pattern for you to print and cut out – here it is!
So! Once you’ve printed your mask pattern there’s a few different options – whether you want to include a pocket for a removable filter, whether you want shaped eyeholes, whether you want a fancy embroidered version… I’m going to try and do a bit of an illustrated tutorial here, but please let me know if you get stuck or if something isn’t clear.
As far as fabric goes – a tightly-woven fabric, probably in a natural fiber. Quilting cotton is ideal, but I’ve also used calico, a linen and cotton blend. The tutorial has me using a tea towel.
If you want shaped eyeholes it’s best to free-hand it (since everyone’s eyes are different, and some people prefer more facial coverage – or less) Just draw a scooped line as pictured.
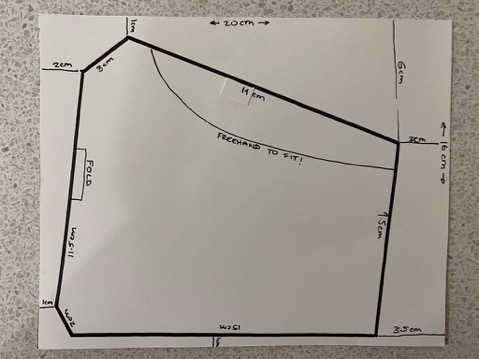
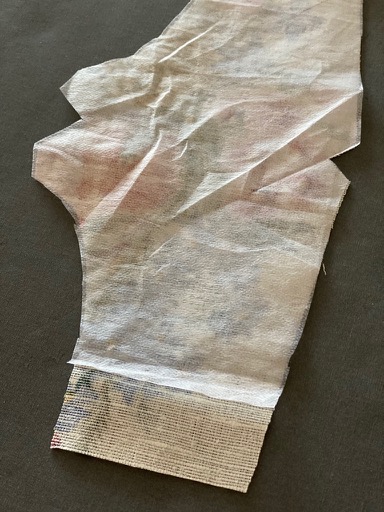
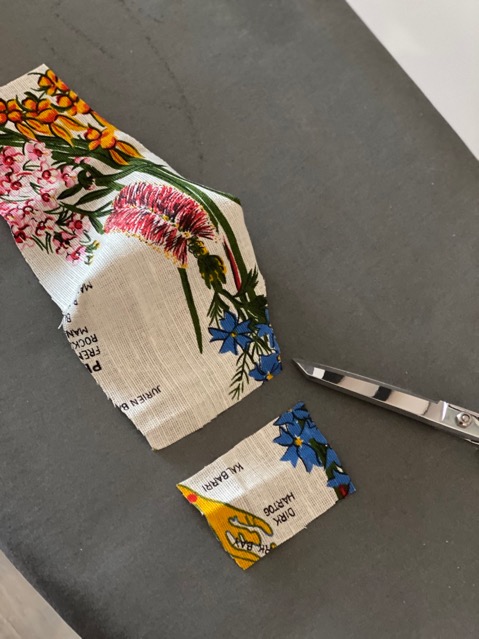
Fold your fabric in half, and line the edge marked “fold” up with the folded side, then cut your piece out. You’ll need two pieces for your mask.
If your fabric is a bit loosely woven, or you just want a bit more protection, it might be worth interfacing the piece of fabric you want to have for the front. You don’t need to interface the edges as these will be rolled to encase the ties. Only interface the front piece.
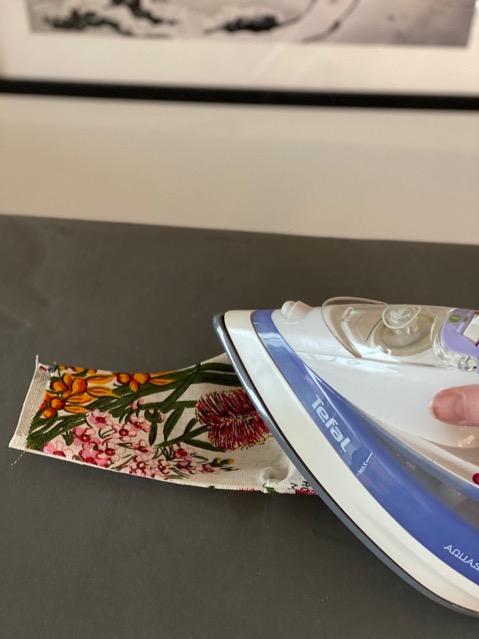
Fold your pieces again right sides together, and sew the two really short diagonal seams. These will form the darts for your nose and chin.
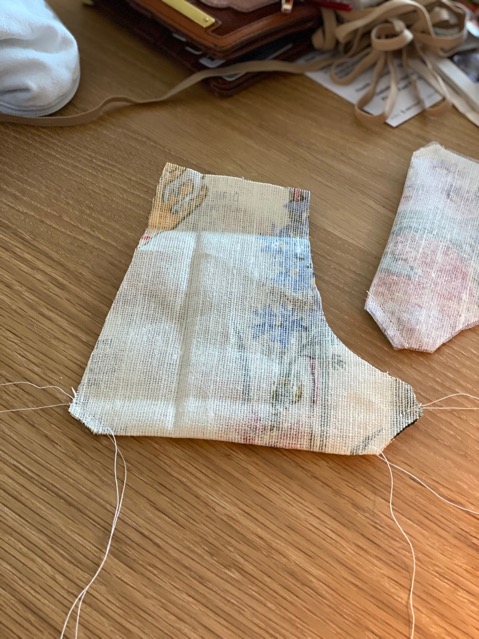
Press the darts open, then repeat for the second piece.
Hooray! You have made your front & back mask pieces! The bigger dart is for your nose, the smaller one is for your chin. Maybe hold it up to your face at this point and make sure you don’t need to make any adjustments.
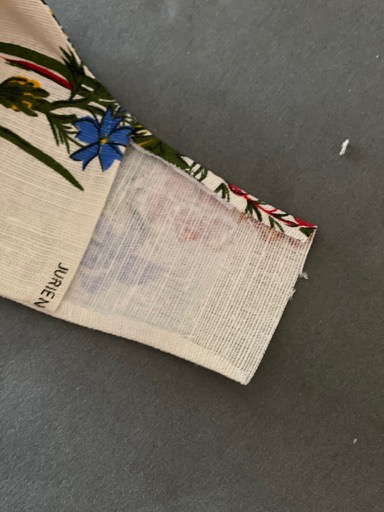
If you want to include a pocket for a replaceable filter take the back piece for your mask (non interfaced) and hold it up to your face. Fold the side in, making sure that you still have plenty of mouth coverage.
Cut off the excess fabric, leaving enough to fold over (wrong sides together because this is your lining piece) and sew a seam to finish the edge.
If you don’t want to include a filter skip all the steps in green text!!
OK! Now put your two mask pieces together, right sides together, and pin the tops and bottoms together.

Sew the two mask pieces together along the top and the bottom (but not the sides), then turn right way out and press.
Again, if you’re making the version with the filter pocket you’ll have a bit of unfinished fabric on the front piece of the mask that corresponds to the fabric that you cropped off the back piece. Just press the edges down and finish them.
Nearly there!
So, you can fasten your mask with ties around the back of the head or elastic around the backs of the ears. I prefer the elastic, but the steps are the same regardless. Turn the edges of the mask in twice (towards the back of the mask!) to form a casing to thread your ribbon/elastic.
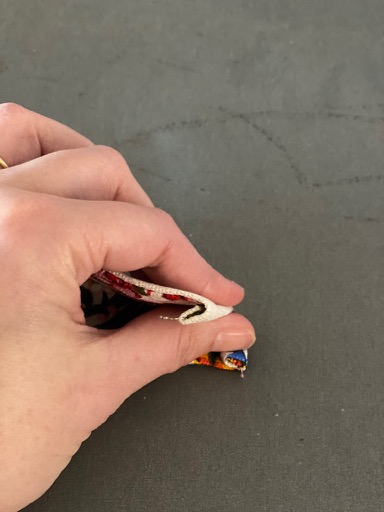
Sew a seam down the rolled side, as close to the edge as possible.
Using a safety pin you can thread the elastic through the casing that you’ve sewn.
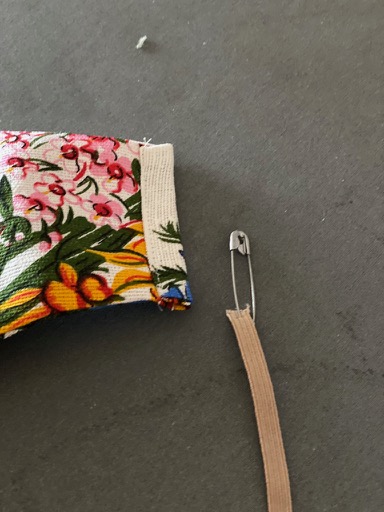
Do the same for the other side. You can see the pocket that has been created for the filter in the image below. This is obviously the back of the mask!
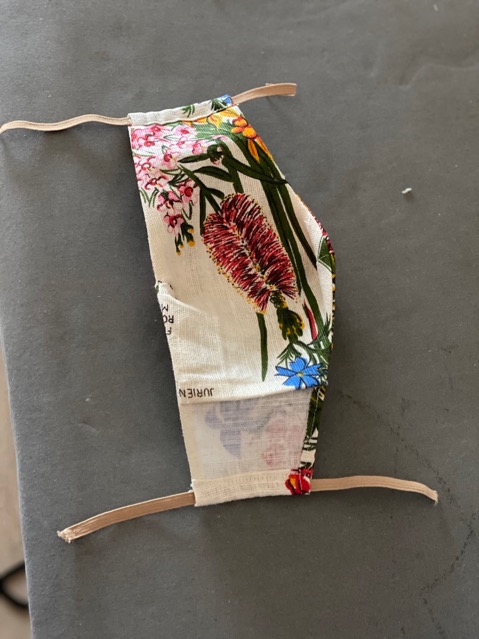
Fit the ties/elastic to be comfortable. (Ease the knots for the elastic into the casing for the sake of tidiness)
Voila!
The World Health Organisation has some good do’s and don’ts for safe cloth mask wearing, and I’d definitely recommend you follow them (here)
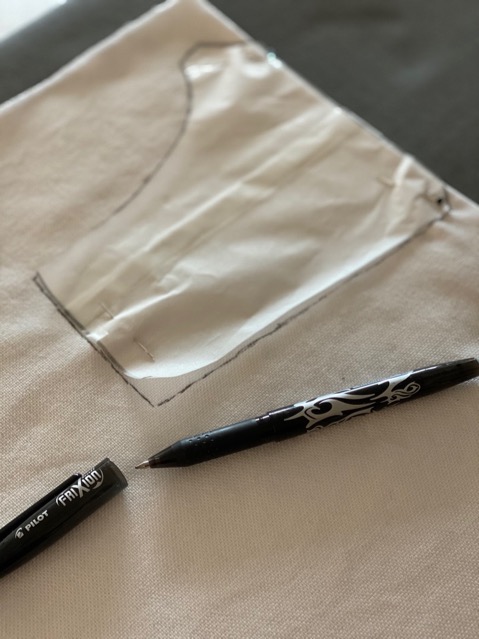
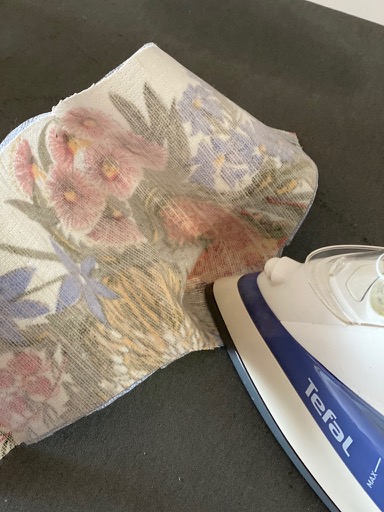
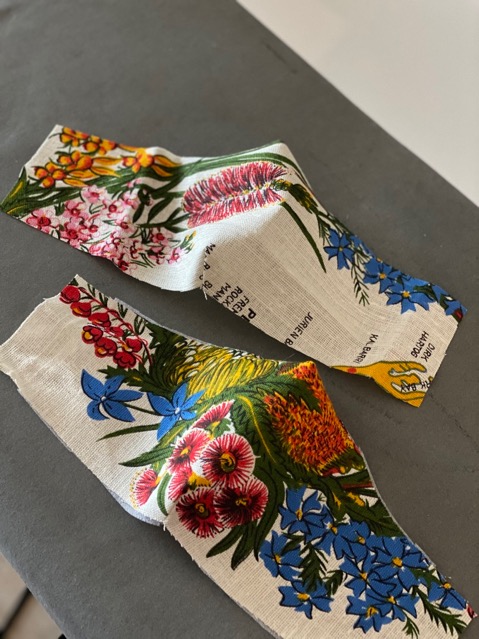
If you want to make an embroidered mask like the one pictured at the top of the post, the steps are exactly the same, but I’d recommend embroidering the fabric before you cut it out. Draw the shape of the mask on your fabric, then (being conscious of the seams, so don’t embroider right to the edges) mark up your pattern. After you’ve finished your embroidery interface the reverse side to help keep the threads in place during washing. This has worked fine for my mask (so far!)
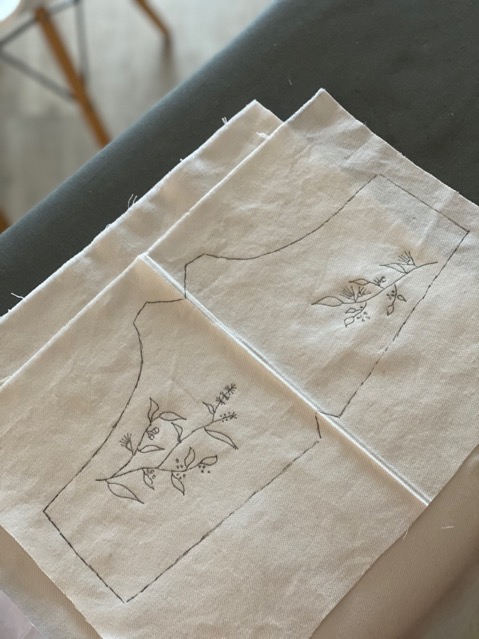
Mine was inspired by an embroidery kit that I bought from Lily Adelaide Upton on Etsy. It was a totally fabulous pattern, and the kit came with everything you needed (hoop, thread, pen, material, etc). The instructions were terrific for this complete beginner, and I’d definitely recommend it if you wanted to try embroidery for the first time.
Super cute!
I’m so sorry Victoria is going through this. I feel the same for our Qld premier – she made quite a few tough calls & was criticized for same but hey, I, for one, am very VERY thankful she stuck to her guns! Prayers for our lovely country & for all our borders to be able to be safely opened soon. Stay well! x
Hi. Thanks for the tutorial. Im definitely making that one ?? A question though: what do you use as a filter? I probably should know that, but I don’t… ?
What a beautiful creation! And no seam on the middle, great pattern. I use a similar one by Dhurata Davies which has an extra chin dart, bit of a fiddle, am going to try yours out, thanks so much.
You’re lucky to have an intelligent premier. Ours (Malta) is a wide boy who cares more about his popularity than anything else. We did really well in our lockdown, then they opened up. Wide open. No tests on arrival so as not to put tourists off. Parties. Festas. Now our R Rate has shot up to 2…. and since the pm forgave all fines imposed during lockdown, the stupid ones are still being stupid.
I made six of these today. I love the design, and they fit perfectly without the need for nose wires. I don’t go out much, but find my stress levels are much higher when my mask doesn’t fit properly and needs constant adjustment, or fits too close to my mouth and nose and makes me feel like I’m oxygen deprived. Having a well-fitting mask will also prove to be a huge contributer to compliance.
Thanks!
Thank you!! I’m making one of these today. I too am happy that Dan is looking after us
Thank you for this great pattern! I’ve just made one and planning quite a few more. So much simpler than the design I’d been using previously.